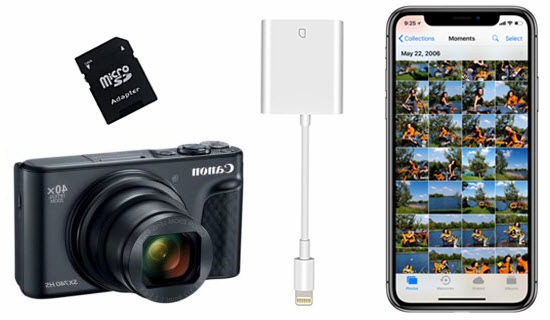
Capturing high-quality images on your digital camera is fantastic, but what if you want to edit or share those photos instantly on your iPhone? Transferring digital camera photos to your iPhone can be simple and quick with the right methods. Whether you prefer a physical connection using adapters or wireless transfer via cloud storage, this guide will walk you through four easy methods. Read on to discover how to move your favorite images from your camera to your iPhone effortlessly.

How to Use a USB Camera Adapter to Transfer Photos
One of the most straightforward and reliable ways to transfer photos from your digital camera to your iPhone is by using a USB Camera Adapter. This method involves a physical connection between your devices, which ensures a secure and fast transfer. Here’s a step-by-step guide to help you get started:
1.Purchase the Correct Adapter: First, you’ll need an Apple USB Camera Adapter. Depending on your camera’s connection type, you may require either the Lightning to USB Adapter or the Lightning to USB 3 Adapter. The USB 3 Adapter allows faster data transfer and simultaneous charging if your iPhone battery is low.
2.Connect the Adapter to Your iPhone: Insert the Lightning connector of the USB adapter into the charging port of your iPhone. Make sure it is securely connected.
3.Attach Your Camera to the Adapter: Use the USB cable that came with your camera. Plug one end of the cable into your camera’s USB port and the other end into the USB Camera Adapter.
4.Turn on Your Camera: Power on your digital camera to establish a connection between the two devices.
5.Open the Photos App: Once your camera is on, your iPhone will automatically detect the connection, and the Photos app should open by itself. If it doesn’t, manually open the Photos app on your iPhone.
6.Import Your Photos: You’ll see an “Import” option on the screen. You can choose to transfer all photos or select specific ones. The import process is quick, and once completed, you’ll find the photos in your iPhone’s Photos app.
7.Disconnect Safely: Once the transfer is finished, turn off your camera and unplug the USB cable and adapter. Your photos are now stored safely on your iPhone.

How to Transfer Photos Using an SD Card Reader
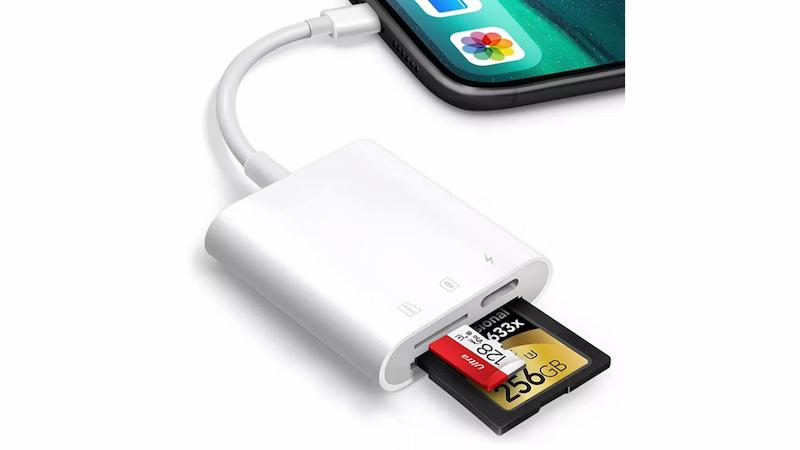
For cameras that use SD cards, the Apple Lightning to SD Card Reader provides another simple way to transfer photos. This method eliminates the need for extra cables, which can be particularly convenient when you’re on the go.
1.Remove the SD Card from Your Camera: After you’ve taken your photos, power off your camera and remove the SD card carefully.
2.Insert the SD Card into the Reader: Take your SD card and insert it into the Apple Lightning to SD Card Reader. Ensure that the card is securely placed inside the slot.
3.Plug the SD Card Reader into Your iPhone: Connect the Lightning end of the SD Card Reader into your iPhone’s charging port.
4.Photos App Opens Automatically: Once the card reader is connected, your iPhone will automatically open the Photos app and display the available photos for import.
5.Import the Photos: Select the photos you wish to transfer, or if you prefer, you can choose to import all the photos on the SD card. The transfer process will begin, and it should be quick depending on the number of photos.
6.Safely Remove the SD Card: After the import is complete, eject the SD card from the reader and place it back into your camera.
How to Transfer Photos Using Wi-Fi or Cloud Storage (iCloud, Google Photos, Dropbox)
For a completely wireless solution, you can use Wi-Fi or cloud storage services like iCloud, Google Photos, or Dropbox to transfer your photos. This method is excellent for photographers who want to avoid physical cables or adapters and prefer to access their images from anywhere.
Using Wi-Fi:
1.Ensure Wi-Fi is Enabled on Your Camera: Most modern cameras come with built-in Wi-Fi capabilities. Make sure this feature is enabled in your camera settings.
2.Install Your Camera’s App on Your iPhone: Download the corresponding app for your camera’s brand (e.g., Canon Camera Connect or Nikon SnapBridge) from the App Store.
3.Pair Your Camera with Your iPhone: Follow the in-app instructions to connect your iPhone to your camera’s Wi-Fi network. Once connected, you can control the camera and transfer photos directly to your iPhone.
4.Transfer Photos: Select the photos you want to transfer and initiate the download within the app. This method allows for easy, wireless transfers without any physical connection.
Using Cloud Storage:
1.Upload Photos to a Cloud Service: Use your computer to upload your camera’s photos to a cloud storage service like iCloud, Google Photos, or Dropbox.
2.Access the Photos on Your iPhone: Open the respective cloud storage app on your iPhone, and you’ll be able to view and download the photos directly to your device.
How are the Wireless Adapters Used for Camera-to-iPhone Transfers?
For cameras without built-in Wi-Fi, you can use wireless adapters designed to enable connectivity between your camera and iPhone. These adapters act as a middleman, facilitating the transfer of images without the need for cables.
1.Choose a Compatible Wireless Adapter: Purchase a wireless adapter like Eyefi or Toshiba FlashAir, which fits into your camera’s SD card slot.
2.Insert the Adapter into Your Camera: Place the wireless SD card adapter into your camera’s SD card slot, just as you would with a standard SD card.
3.Install the Adapter’s App: Download the app that corresponds to the wireless adapter brand on your iPhone.
4.Connect to the Adapter’s Wi-Fi Network: Once the adapter is in your camera, it will create a Wi-Fi network. Connect your iPhone to this network by selecting it in your Wi-Fi settings.
5.Transfer Photos via the App: Open the adapter’s app on your iPhone and select the photos you want to transfer. The app will wirelessly transfer your images from the camera to your iPhone, eliminating the need for cables.
Conclusion
Transferring digital camera photos to your iPhone doesn’t have to be complicated. Whether you prefer a wired connection using USB adapters and SD card readers or you enjoy the convenience of wireless methods such as Wi-Fi, cloud storage, or wireless adapters, there’s a solution to suit your needs. With the right method, you can easily access, edit, and share your high-quality images on the go. Choose the option that works best for your workflow and start transferring your photos with ease.
FAQs
Can I transfer RAW photos from my camera to iPhone?
Yes, you can transfer RAW photos from your camera to your iPhone, provided your iPhone and the Photos app support the RAW file format. Many newer iPhones can display and edit RAW images directly, but you may need specialized apps for more advanced edits.
What should I do if my iPhone does not recognize the camera?
If your iPhone does not recognize the camera, try the following:
Is it faster to transfer photos wirelessly or via cable?
Wired transfers using USB adapters or SD card readers are generally faster than wireless transfers. Wireless methods, such as Wi-Fi or cloud storage, are more convenient but may take longer, especially if transferring large files or multiple images at once. For quicker transfers, wired solutions are recommended.
