An air bed can be a convenient and comfortable sleeping option, whether you’re camping or accommodating guests at home. However, a sudden leak can turn a good night’s sleep into a frustrating experience. Learning how to patch up an air bed is an essential skill that can save you from having to purchase a new one. This step-by-step guide will walk you through the process of locating the leak, preparing the area, applying the patch, and ensuring a strong bond, so you can get your air bed back in working order quickly.

Locating the Leak in Your Air Bed
Before you can repair your air bed, you need to find the source of the leak. This step is crucial because a poorly identified leak will render your repair efforts ineffective.
1.Visual Inspection: Begin by fully inflating your air bed and inspecting it visually. Look for any obvious signs of damage, such as punctures or tears. Pay close attention to the seams, as these areas are common sites for leaks.
2.Listening for Air Escapes: If you can’t find the leak through visual inspection, listen carefully for the sound of escaping air. Slowly move your ear around the surface of the mattress, especially around the seams and corners.
3.Soap and Water Method: For smaller or less obvious leaks, mix a solution of soap and water. Apply it to the surface of the air bed using a sponge or spray bottle. Watch for bubbles forming, which indicate the location of the leak.
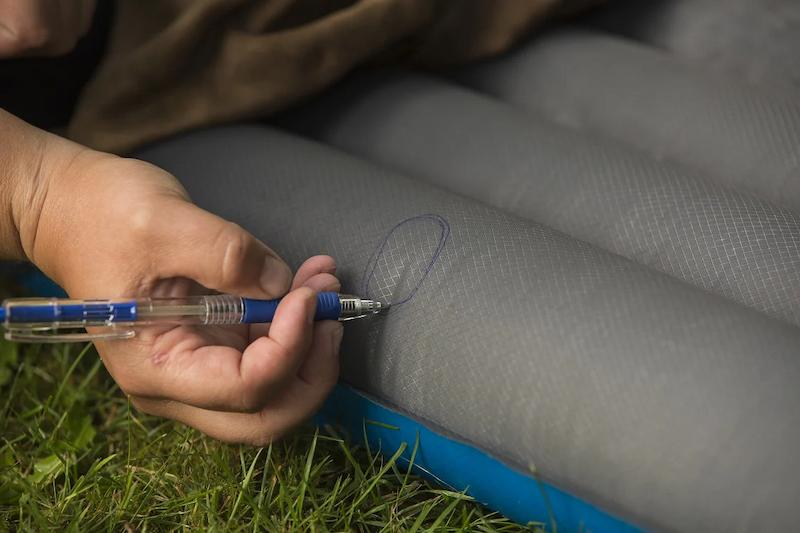
4.Mark the Spot: Once you’ve located the leak, mark the spot with a permanent marker or a piece of tape. This will help you easily find the leak again when you’re ready to apply the patch.
Preparing the Area for Repair
Proper preparation of the area around the leak is essential for ensuring that the patch adheres well and creates a strong, long-lasting bond.
1.Deflate the Air Bed: Completely deflate the air bed before you begin the repair. This will make the surface flat and easier to work with.
2.Clean the Area: Use a damp cloth to clean the area around the leak, removing any dirt, dust, or oil. For best results, use rubbing alcohol to ensure the surface is free of any residue that could interfere with the adhesive.
3.Dry the Surface: Allow the area to dry completely before applying the patch. A clean, dry surface is crucial for achieving a strong bond between the patch and the air bed.
4.Smooth the Surface: If the area around the leak is wrinkled or uneven, try to smooth it out. This will help the patch adhere more evenly and prevent air from escaping later on.
Applying the Patch

Once the leak has been identified and the area prepared, it’s time to apply the patch. This step is straightforward but requires careful attention to detail to ensure a successful repair.
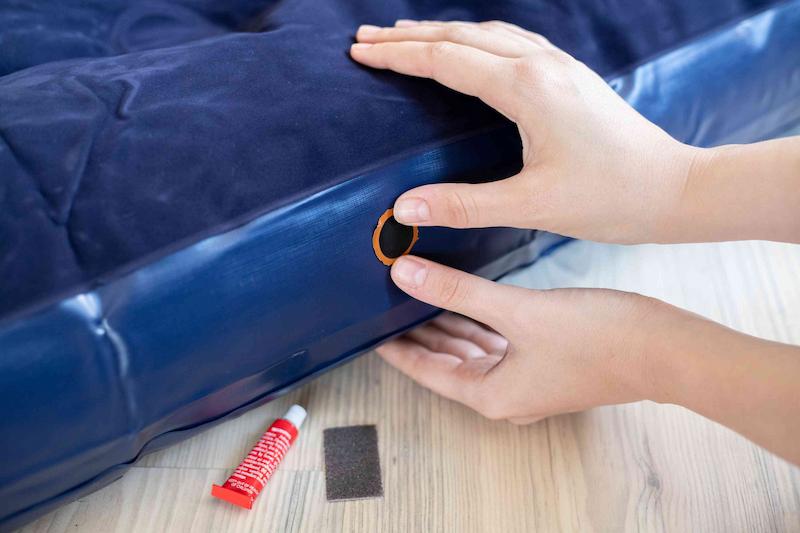
1.Select the Right Patch: Most air beds come with a repair kit that includes patches and adhesive. If you don’t have a repair kit, you can purchase one at most outdoor or home improvement stores. Make sure the patch is large enough to cover the leak with some overlap around the edges.
2.Cut the Patch: Cut the patch to size, ensuring that it’s at least an inch larger than the hole on all sides. A larger patch provides more coverage and creates a better seal.
3.Apply the Adhesive: If your patch requires adhesive, apply a thin, even layer to the back of the patch and to the area around the leak. Some patches are self-adhesive, in which case you can skip this step.
4.Press and Hold: Place the patch over the leak and press down firmly. Use a flat object, such as the edge of a credit card, to smooth out any air bubbles and ensure the patch adheres evenly.
5.Let It Cure: Allow the adhesive to cure for the recommended time, usually a few hours or overnight, depending on the product instructions. Avoid inflating the bed during this time to ensure the patch bonds properly.
Ensuring a Strong Bond
After applying the patch, it’s important to ensure that it has bonded strongly to the air bed to prevent future leaks.
1.Apply Pressure: Once the patch is in place, apply pressure for a few minutes to ensure a secure bond. You can use a heavy object, like a book, to hold the patch down while it cures.
2.Reinforce the Edges: If you want extra security, you can apply a small amount of adhesive around the edges of the patch to seal it further. This step can help prevent the edges from peeling up over time.
3.Check for Bubbles: After the adhesive has dried, inspect the patch for any air bubbles or loose edges. If you notice any, press them down and apply additional adhesive if necessary.
4.Wait Before Use: To ensure the patch is fully bonded, wait the full recommended curing time before reinflating and using the air bed. Rushing this step can weaken the bond and result in a failed repair.
Testing and Re-Inflating the Air Bed
Once the patch has fully cured, it’s time to test your repair and re-inflate the air bed.
1.Inflate the Air Bed Slowly: Start by slowly inflating the air bed to its normal pressure. Listen closely for any signs of air escaping, especially around the patched area.
2.Check the Patch: While the air bed is inflating, check the patch to make sure it’s holding up. Look for any signs of lifting or bubbling, which could indicate a weak bond.
3.Conduct a Final Inspection: After the air bed is fully inflated, perform a final inspection. Check the entire surface for any additional leaks or weak spots that may need attention.
4.Test It Out: Lay down on the air bed and move around to ensure the patch holds up under pressure. If everything looks good and the bed remains fully inflated, your repair is complete!
Conclusion
Patching up an air bed is a simple and cost-effective way to extend its lifespan and ensure you can continue to enjoy a good night’s sleep. By carefully locating the leak, properly preparing the area, and applying the patch with precision, you can effectively repair your air bed and prevent further issues. Regular maintenance and timely repairs will help keep your air bed in top condition, saving you money and providing comfort for years to come.
FAQs
What household items can you use to patch an air mattress?
In a pinch, you can use items like duct tape, a strong adhesive, or even a bicycle tire patch to temporarily repair an air mattress. However, these are not long-term solutions and should be replaced with a proper patch kit as soon as possible.
How do I make sure my air mattress doesn’t leak?
To prevent leaks, regularly check the mattress for signs of wear and tear, keep it clean, and avoid over-inflating it. Store it in a cool, dry place when not in use and avoid placing it on sharp or rough surfaces that could cause punctures.
Why does my air bed deflate overnight?
An air bed may deflate overnight due to small, undetected leaks, temperature changes causing the air to contract, or a valve that isn’t fully closed. Check for leaks using the soap and water method, ensure the valve is secure, and avoid drastic temperature changes to minimize deflation.
