Logo
31 Oct 2024

How to Hang Kitchen Cabinets: A Complete DIY Installation Guide

Post by Callie

Renovating your kitchen and installing new cabinets can significantly enhance the functionality and aesthetic appeal of your space. While it may seem like a daunting task, hanging kitchen cabinets with care and precision can be achieved with the right tools, planning, and execution. In this guide, we’ll walk you through the step-by-step process of how to hang kitchen cabinets, ensuring a smooth and successful installation.
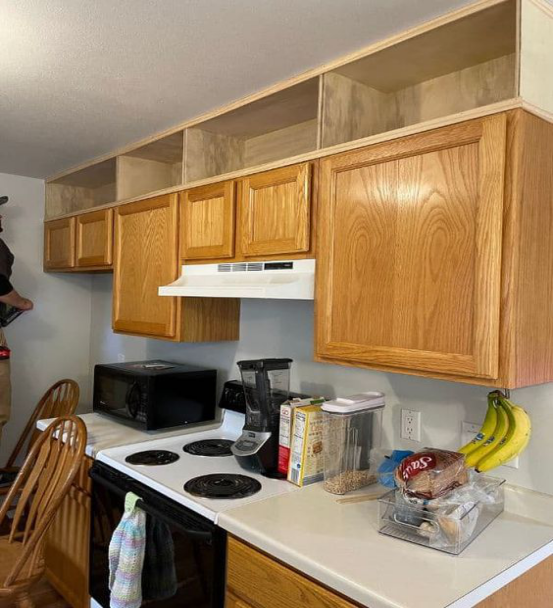
Preparing for the Installation

Before you start hanging kitchen cabinets, proper preparation is key. This includes gathering the necessary tools and materials, measuring the space and planning the cabinet layout.

  • Measure and plan: The first step in how to hang kitchen cabinets is to measure your space meticulously. Take note of the dimensions of your walls, the height of your ceilings, and the location of any obstructions like electrical outlets or plumbing pipes. Use these measurements to create a detailed plan, including the layout of your cabinets and the order in which you’ll install them.
  • Gather tools and materials: Equip yourself with the necessary tools and materials for the job. You’ll need a tape measure, level, pencil, stud finder, power drill, screws, wall anchors, and of course, your kitchen cabinets. Ensure all parts are accounted for and in good condition before proceeding.
  • Prepare the walls: Clean and prepare the walls where you’ll be hanging your cabinets. Remove any existing wall coverings or paint that may interfere with the installation.
  • Step-by-Step Installation Process

    Now that you’re ready, let’s look at the actual suspension process together.

    1. Mark the Position

    The first step is to mark the exact positions where your cabinets will be mounted. Before doing this, double-check the cabinet layout plan and the dimensions of the kitchen space.

  • Measure the Space: Begin by measuring the height of the base and wall cabinets. Use a measuring tape to measure from the floor to where the bottom of the upper cabinets should be. Typically, upper cabinets are mounted about 18-20 inches above the countertop to provide enough working space.
  • Mark the Locations: Use a pencil to mark the height of the base of the upper cabinets on the wall. Draw horizontal lines along these measurements to ensure everything is straight. Use a level to ensure that the lines are perfectly horizontal. Mark the location of studs in the wall, as these will be the anchor points for securing the cabinets.
  • Pro Tip: Use painter’s tape on the wall to mark the position instead of pencil lines if you want to avoid visible marks.

    2. Attach Hanging Rails or Cleats

    Most modern cabinets utilize either hanging rails or cleats to ensure they are securely fastened to the wall. These provide a sturdy foundation for the cabinets to hang from and distribute the weight more evenly.

  • Prepare the Wall: Locate the wall studs using a stud finder. Mark the center of each stud, as you’ll need to fasten the hanging rails or cleats directly into them to ensure maximum stability.
  • Install Hanging Rails or Cleats: If your cabinets come with hanging rails, secure them along the lines you marked earlier. For cleats, use a piece of wood cut to the length of your cabinet. Drill pilot holes through the cleat and into the studs. Then, use strong screws to attach the cleat securely to the wall. Ensure everything is level and that the cleats or rails are firmly fastened. If necessary, add extra screws for added stability.
  • Pro Tip: Use a temporary support board or cleat under the cabinets to help hold them up while securing them.

    3. Lift and Hang the Cabinets

    Once your rails or cleats are in place, it’s time to lift and hang your cabinets. Having a partner at this stage is crucial, as cabinets can be heavy and awkward to maneuver.

  • Lift the First Cabinet: Start with the corner cabinet, as this will help anchor the entire row of cabinets. Carefully lift the cabinet into position, aligning it with the marks you made earlier. The cabinet should rest on the cleat or rail securely.
  • Check Alignment: Before securing the cabinet, use a level to ensure it is perfectly straight both horizontally and vertically. This step is essential to prevent misalignments that can affect the entire row of cabinets.
  • Secure the Cabinet: Once aligned, use screws to fasten the cabinet to the wall studs through the back of the cabinet. Make sure the screws are long enough to anchor into the studs securely. For each stud, drill pilot holes through the cabinet and use cabinet screws (at least 2½ to 3 inches) to fasten it. Tighten the screws but do not overtighten, as this could damage the cabinets or walls.
  • Repeat for Each Cabinet: Continue installing each cabinet one by one, working outward from the corner cabinet. Ensure that each cabinet is level and flush with the adjoining cabinet before securing it. Use clamps to hold the cabinets together while you screw them into the wall to maintain alignment.
  • Pro Tip: To maintain an even gap between cabinets, use small shims between the cabinets before securing them together.

    4. Install Supporting Brackets and Shelves

    As you install each cabinet, ensure that any supporting brackets, shelves, or interior hardware are also properly secured.

  • Add Support Brackets: If your cabinets come with additional supporting brackets, make sure they are installed underneath the cabinets or between wall and cabinet to provide extra stability, especially for larger or heavier cabinets.
  • Install Shelves: After securing the cabinets to the wall, install the internal shelving. Most cabinets have adjustable shelf brackets, so make sure you set the shelves at your desired height before loading them with kitchen essentials.
  • Pro Tip: Use adjustable shelf supports so that you can customize the height of the shelves as your storage needs change.

    5. Fill in Gaps and Finish Up

    Once the cabinets are securely in place, it’s time to handle the final touches that will give your kitchen a polished and professional appearance.

  • Fill Gaps Between Cabinets: Use filler strips to close gaps between cabinets. These are typically thin strips of wood that match your cabinets and can be cut to fit. Attach them using small finishing nails or screws.
  • Caulk Gaps Around Edges: Where the cabinets meet the wall or ceiling, you may notice slight gaps. Apply a bead of paintable caulk to these gaps and smooth it out with a wet finger or caulking tool. This will create a seamless transition between the cabinets and the walls, giving the installation a professional finish.
  • Attach Hardware: Now that the cabinets are up, it’s time to attach the hardware. Install door handles, knobs, drawer slides, and hinges according to the manufacturer’s instructions. Ensure that the hardware is centered and aligned properly to avoid any crooked or uneven handles.
  • Adjust Doors: After installing the cabinet doors, check that they open and close smoothly and are properly aligned. If necessary, adjust the hinges until the doors hang evenly and don’t catch on each other.
  • Pro Tip: Use slow-close hinges and drawer slides for a more premium kitchen experience.

    Common Mistakes to Avoid When Hanging Kitchen Cabinets

    Even the most seasoned DIYers can make mistakes during cabinet installation. Let’s highlight a few common ones:

    1.Skipping Measurements: This one is huge! Failing to measure accurately can result in misaligned cabinets, and that’s a tough problem to fix once the cabinets are up.

    2.Ignoring Wall Studs: Cabinets need to be attached to the studs to prevent them from coming loose. Never underestimate the importance of securely fastening cabinets to the studs.

    3.Rushing the Leveling Process: A few millimeters off might not seem like much, but over the length of an entire row of cabinets, it can be noticeable. Take your time to ensure every cabinet is level.

    4.Overtightening Screws: It’s tempting to crank down on those screws, but overtightening can strip the wood or cause misalignment.

    Avoiding these mistakes will save you a lot of frustration down the line.

    Conclusion

    How to hang kitchen cabinets? With patience, the right tools, and a bit of elbow grease, you can tackle this project yourself and achieve a professional result. From the careful measuring to the final touches, every step adds up to a kitchen you can be proud of. So, roll up your sleeves and get started—the heart of your home is just a few cabinets away from looking its best.

    FAQs

    Can I install kitchen cabinets without professional help?

    Absolutely! With the right tools, patience, and careful preparation, hanging kitchen cabinets can be a DIY project. However, if you’re dealing with complex layouts or unsure about your skills, calling in a pro can save time and headaches.

    How do I ensure kitchen cabinets are level?

    To ensure kitchen cabinets are level, use a spirit level to check alignment and shim the base if necessary. Start by leveling the base cabinets first, securing them to the wall, and then level and attach the upper cabinets.

    What type of screws should I use for hanging kitchen cabinets?

    For hanging kitchen cabinets, use #10 or #12 screws that are at least 2.5 to 3 inches long. Ensure they’re designed for wood and have a strong grip in studs or cabinet brackets.

    How can I adjust kitchen cabinets that are misaligned after installation?

    Most modern cabinets have adjustable hinges that allow you to fine-tune the alignment of the doors and drawers. If needed, you can also add or remove shims to level cabinets that are out of alignment.