
23 Oct 2024
Post by Callie
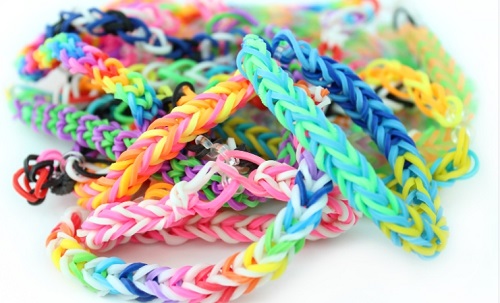
Gimp bracelets, made from colorful plastic cords, are a fantastic way to showcase your creativity. Whether you’re making them for yourself or as gifts, these vibrant accessories are fun to craft and wear. In this guide, we’ll walk you through everything you need to know to start making gimp bracelets, from materials and tools to advanced techniques. Let’s dive into this creative and enjoyable craft!
What are Gimp Bracelets?
Gimp bracelets are stylish, handmade accessories crafted using gimp, a type of plastic lace. This lace is often used in various craft projects due to its durability and flexibility. Gimp bracelets are characterized by their vibrant colors and intricate patterns, making them a popular choice for personalizing your accessory collection or gifting to friends.
Key Features:
Creating gimp bracelets allows for personal expression through unique patterns and color combinations. Whether you’re new to crafting or looking for a fun project, making gimp bracelets is a rewarding and creative endeavor.
Materials and Tools Needed for Making Gimp Bracelets
Before you start crafting your gimp bracelet, gather all the necessary materials and tools. Having everything at your fingertips will streamline the process and make crafting more enjoyable.
Materials:
Tools:
Having these materials ready will make the bracelet-making process more efficient and enjoyable. Make sure your workspace is organized to avoid losing any small components.
How to Make Your First Gimp Bracelet?
Now that you have your materials and tools ready, follow these steps to create your first gimp bracelet:
Step 1: Cut the Gimp
Measure and cut a piece of gimp lace that is about twice the length of your wrist circumference. This will give you enough length to work with when creating your bracelet.
Step 2: Prepare Your Workspace
Lay the gimp lace flat on your workspace. If you are using beads, thread them onto the gimp before you start braiding or knotting.
Step 3: Create a Basic Knot
To start, create a simple knot at one end of the gimp to form the base of your bracelet. This knot will serve as the starting point for your design.
Step 4: Weave Your Bracelet
Choose a weaving technique such as the spiral knot or the fishtail braid. For beginners, the fishtail braid is straightforward:
Step 5: Secure the Bracelet
Once you’ve reached the desired length, tie a knot at the end to secure the bracelet. Trim any excess gimp with scissors.
Step 6: Attach the Clasp
If you’re using a clasp, attach it to both ends of the bracelet. If not, you can tie the ends together to form a loop that fits comfortably around your wrist.
Step 7: Finish and Seal
Use a lighter or fray check to seal the ends of the gimp to prevent fraying. Ensure the bracelet is secure and comfortable to wear.
Congratulations! You’ve successfully made your first gimp bracelet. Wear it proudly or share it with friends!
Advanced Techniques and Patterns for Gimp Bracelets
Once you’re comfortable with the basics, you might want to explore more advanced techniques and patterns. These can add complexity and uniqueness to your gimp bracelets.
1. Celtic Knots
Celtic knots create intricate designs and require more detailed weaving. They add a touch of elegance to your bracelets.
2. Macramé Patterns
Macramé techniques involve knotting the gimp in various patterns, such as square knots or half-hitches. This creates textured and visually appealing designs.
3. Incorporating Beads
Adding beads to your gimp bracelet can enhance its visual appeal. Thread beads onto the gimp at regular intervals for a decorative effect.
4. Multi-Color Designs
Experiment with different colors of gimp to create vibrant, multi-colored patterns. You can alternate colors or create stripes and gradients.
Advanced techniques may take some practice, but they can significantly enhance the look and feel of your gimp bracelets. Don’t be afraid to experiment and find designs that suit your style.
Conclusion
Making gimp bracelets is a fun and creative way to express your style. With just a few materials and tools, you can craft colorful and unique accessories that reflect your personality. Whether you’re a beginner or looking to explore advanced techniques, creating gimp bracelets offers endless possibilities for customization and design. Enjoy the process and the satisfaction of wearing or gifting your handmade creations.
FAQs
How long should gimp be for the bracelet?
For a standard bracelet, cut the gimp to be twice the length of your wrist measurement. This allows enough length to create the bracelet and tie it off securely.
How can I make my gimp bracelet more durable?
To enhance durability, ensure that you seal the ends of the gimp with a lighter or fray check. Additionally, avoid excessive stretching or exposure to water to maintain the bracelet’s integrity.
Can gimp bracelets be washed or cleaned?
Gimp bracelets can be cleaned by gently wiping them with a damp cloth. Avoid submerging them in water as it may weaken the plastic. For tough stains, use a mild soap and water solution, then let the bracelet air dry completely.